After my last blog post about the, Thank-You Game, I received a request asking me to explain how I attached images to the dice using Smart Board Notebook software. I created a video of the process and listed the steps below:
Video Player
00:00
00:00
- After creating a new Smart Board project, click on the picture icon on the left side of the screen. (Just below the white page icon and above the paperclip icon).
- In the search area, type in dice. Click on “Interactive and Multimedia”. Scroll down to the picture of the of the dice that says, “Dice – image”. Either double click the picture or drag and drop it to the main working area.
- You can adjust the size of the dice using your mouse or tracking pad (Mac) by clicking and dragging the lower left corner.
- In order to add images, click on the arrow on the upper right hand corner. The dice will open and show 6 squares with writing that says, “Drag image here”.
- I use a Macbook Pro computer, so after I downloaded images, I clicked on the download folder and the images popped up in the finder. I simply dragged and dropped the images onto each square. You’ll notice that the color of the square changed to yellow when the picture was in the correct position.
- An option you may want to consider is whether or not to permit images to be repeated in a row. I chose to not have them repeat so that a different image would come up each time.
- Once your pictures are in place, click the arrow in the upper right hand corner again.
- Put the Smart Board in Full Screen Mode to see how it will look on a classroom Smart Board. However, be aware that it make look different on your computer screen compared to the classroom Smart Board. At first, I enlarged the dice in my program and they looked awesome on the computer. In the classroom, they were so big, you couldn’t even tell they were dice. LOL!
- Murphy’s Law — It’s always a good idea to have a plan B. In one of my classrooms, the Smart Board wasn’t working correctly and students had to click the dice manually about 25 times before the picture would change. So we turned it into a counting activity as well.
- This activity can definitely go low tech.

- Print out some pictures and put them in a bag or container. Pass an instrument around to a popular song (either recorded or played live). When the music stops, the person who has the instrument gets to pick one of the pictures from the bag….and practice saying, “Thank you”. (Laminating the pictures will help them to last longer.
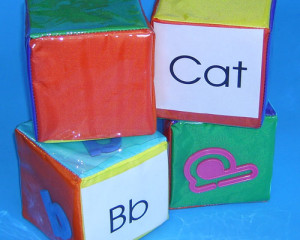
- There are dice with pockets that you can customize with your own pictures from Oriental Trading Company and other retailers.
- Fun fact: The singular version of “dice” is “die”. However, according to the Oxford Dictionary, it is now common practice to accept “dice” as both the plural and singular form.


